Mastering Harvest Moon Photography: From Planning to Post-Processing
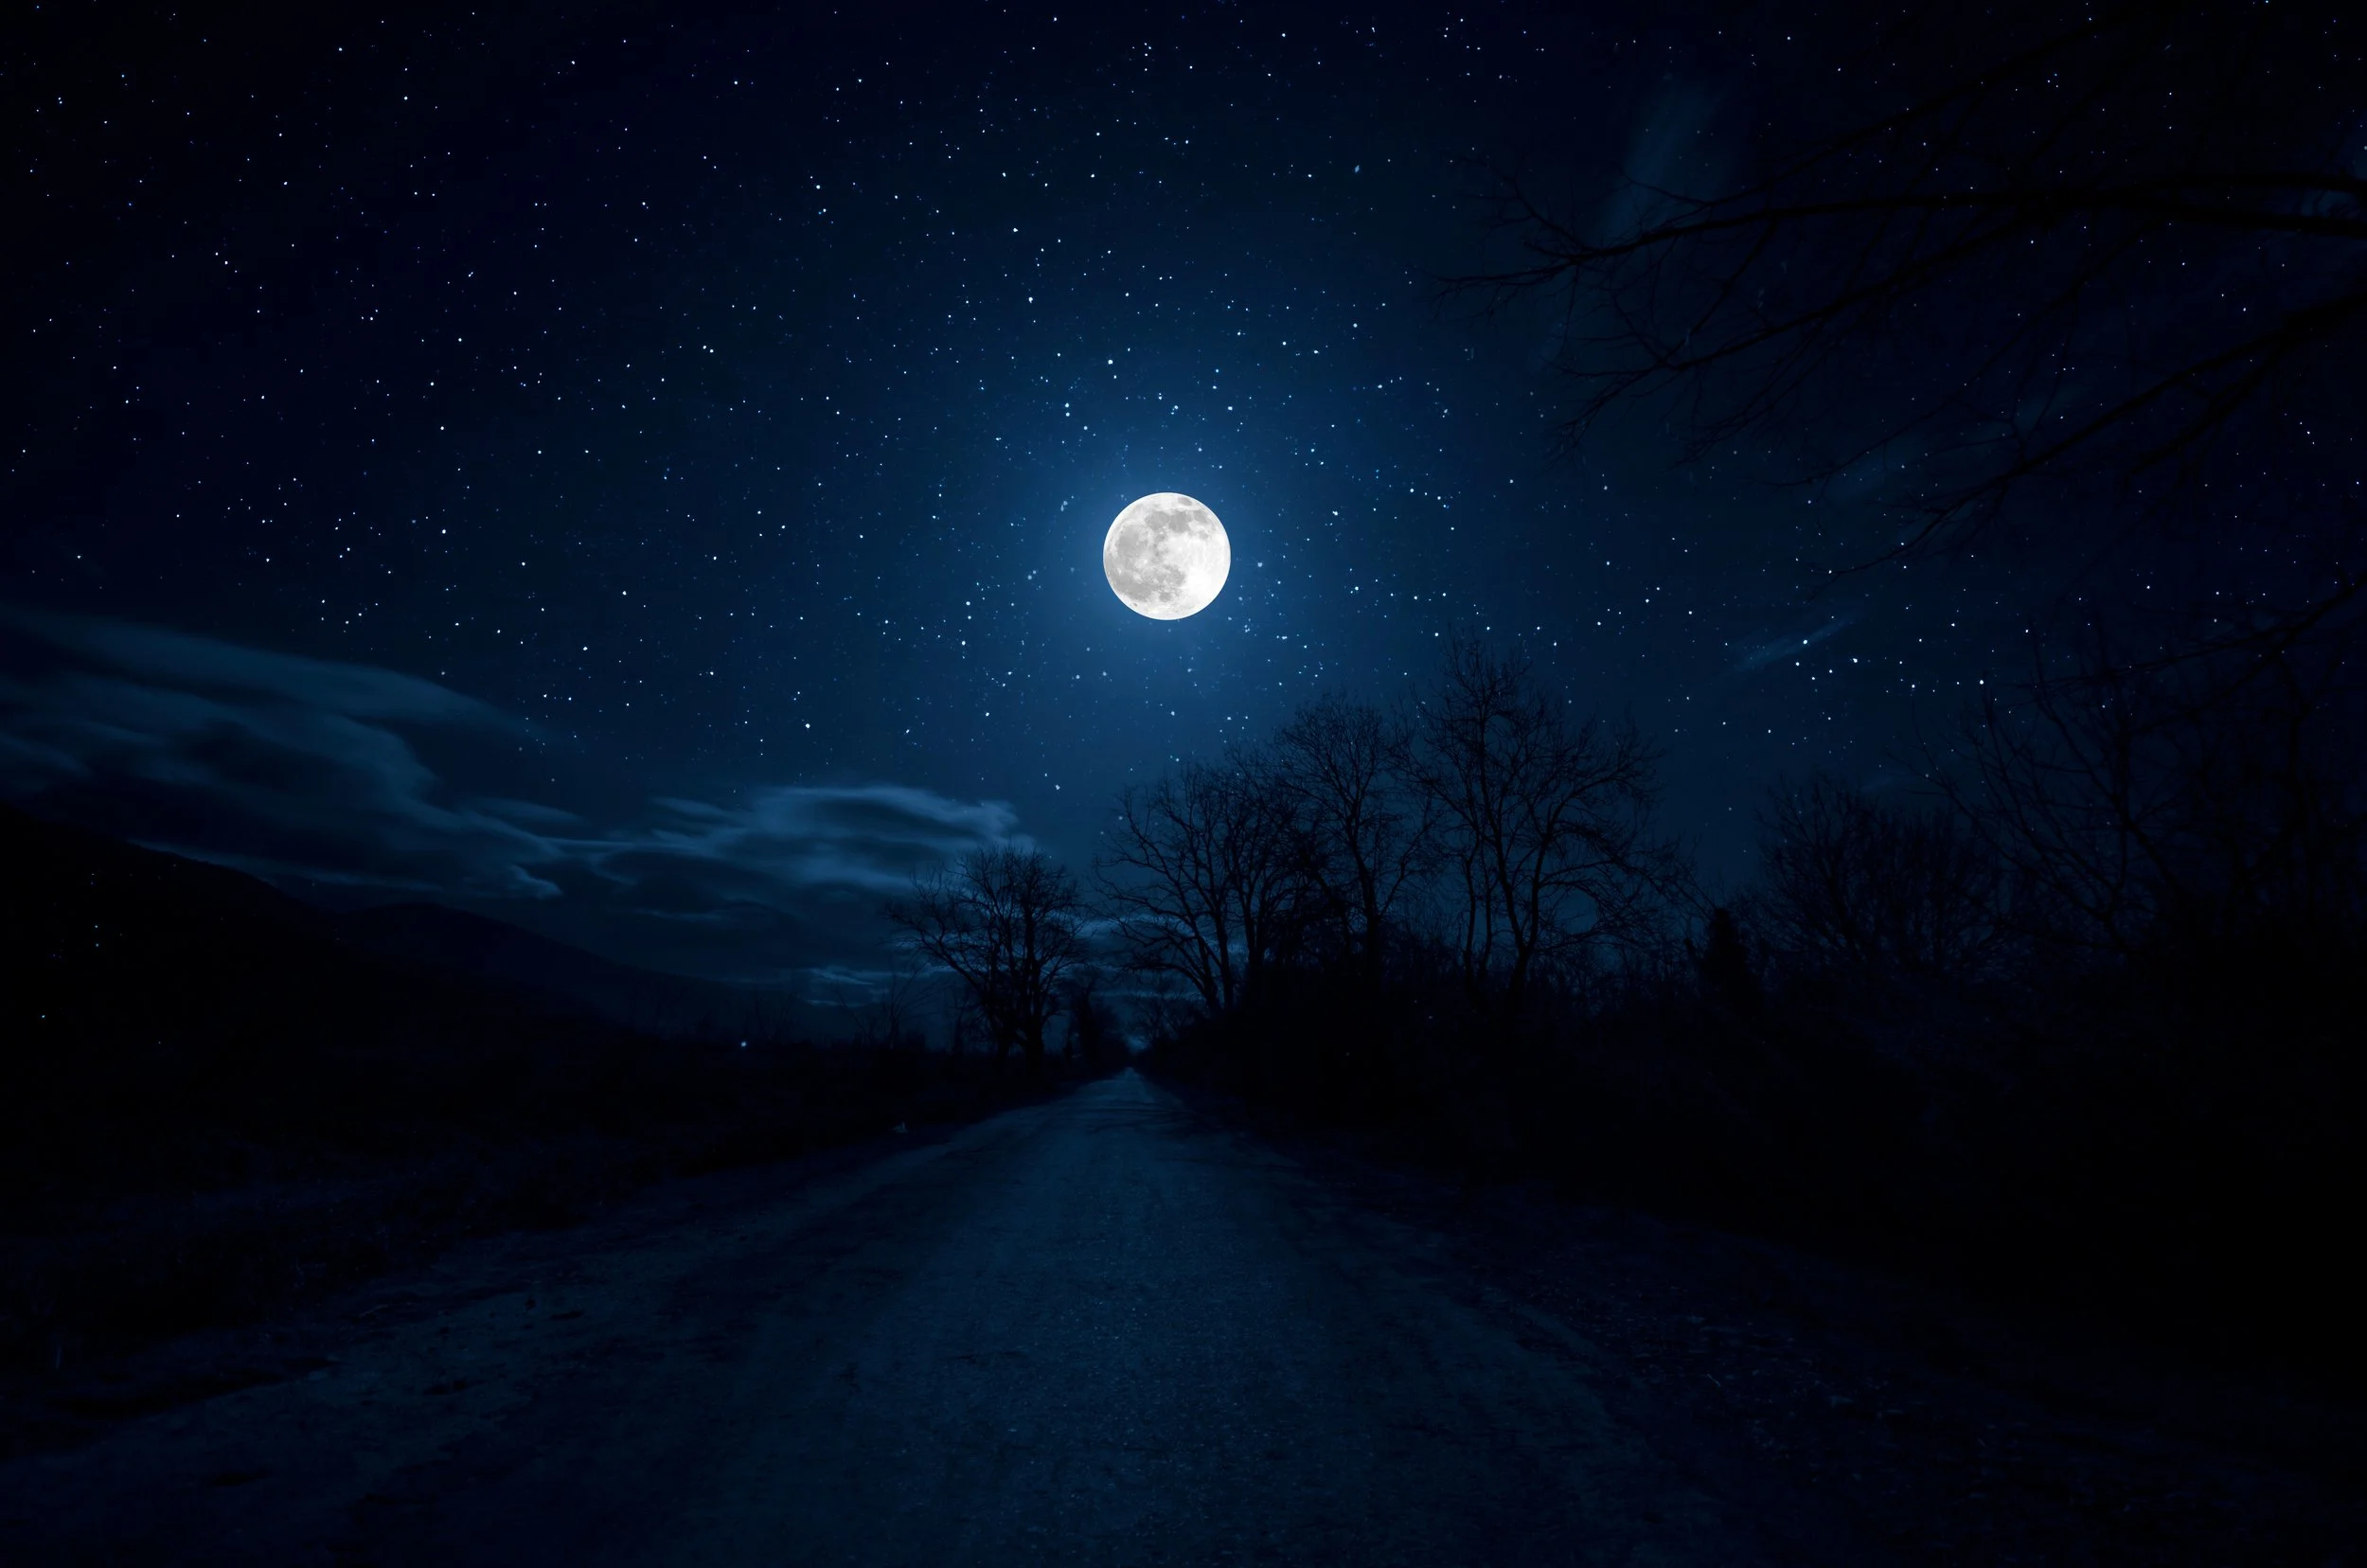
The Harvest Moon rises behind a silhouetted forest canopy.
Table of Contents
1. WHAT IS THE HARVEST MOON?Understanding the celestial phenomenon and its significance |
3. ESSENTIAL GEAR FOR HARVEST MOON PHOTOGRAPHYCameras, lenses, and accessories for lunar shots |
5. COMPOSITION TECHNIQUESFraming and creative approaches for moon photography |
7. POST-PROCESSING YOUR HARVEST MOON PHOTOSEnhancing and perfecting your lunar images |
2. PLANNING YOUR HARVEST MOON SHOOTChoosing locations and preparing for the event |
4. CAMERA SETTINGS FOR GREAT MOON SHOTSMastering exposure, focus, and image formats |
6. CAPTURING THE SHOT: STEP-BY-STEP GUIDEDetailed process for photographing the Harvest Moon |
8. ADDITIONAL RESOURCESFurther learning and workshop information |
I set my tripod down on a crisp autumn evening. The anticipation of capturing another full moon filled me with excitement. There's something magical about the moon on this particular evening in September that draws photographers of every kind to venture out into the open, and place themselves under the hypnotic hold of the evening sky. The Harvest Moon, with its warm, golden glow, and larger-than-life appearance, drowns out the light of any stars surrounding it. To the nocturnal eye, it’s almost as bright as the sun on a cloudy day, and it offers a unique opportunity to create spectacular images that showcase the incredible beauty of our celestial neighbor. Whether I capture the moon with my camera or not, tonight will be a night to remember!
In this guide, I'll share my personal experiences and expertise to help you master lunar photography techniques. Whether you're a beginner eager to capture your first lunar shot or an experienced photographer looking to refine your technique, I hope you'll find some valuable insights. By the end of this post, you'll be equipped with the knowledge to create breathtaking Harvest Moon images that will leave your viewers in awe.
Let's get down to it!
What is the Harvest Moon?
The Harvest Moon has a unique history and culture significance that makes it rather special. Tonight, I’m not witnessing just any full moon; tonight is an annual event that occurs closest to the autumnal equinox, typically falling in September or early October. In 2024, we can look forward to the Harvest Moon gracing our skies on September 17th.
The Harvest Moon earned its name from agriculture. In the days before artificial lighting, farmers relied on a bright moonlit night to extend their workday, allowing them to harvest crops well into the evening. As a photographer, I've come to appreciate how this lunar event bridges the gap between human culture and celestial phenomena.
One of the most captivating aspects of the Harvest Moon for photography is its apparent size and color. When the moon is near the horizon, it often appears larger due to an optical illusion called the "moon illusion." This effect, combined with the atmosphere's scattering of light, can give the moon a stunning orange or golden hue.
I remember my first time capturing the Harvest Moon as it peeked over a field of cornstalks. The glow it cast across the landscape was simply breathtaking, creating a scene that seemed almost surreal. This unique combination of size, color, and cultural significance makes the Harvest Moon a prime subject for photographers looking to capture something truly special.
Planning Your Harvest Moon Shoot
Planning is crucial for successful Harvest Moon photography, and I've learned this the hard way. I once drove two hours to a location, only to find the moon rising in a completely different spot than I had anticipated. Now, I always follow a careful planning process to ensure I'm in the right place at the right time.
Choose the Right Location
First, choosing the right location is key. I look for spots that offer an interesting foreground to complement the moon. This could be a lone tree, a mountain range, or even urban architecture. The goal is to create a composition that gives context to the moon and adds depth to your image. Some of my favorite locations have included lakeshores, where the moon's reflection doubles the impact, and open fields that allow for an unobstructed view of the horizon.
To pinpoint the exact location and timing of the moonrise, I rely heavily on planning tools and apps. PhotoPills and Stellarium are two popular services that offer a detailed look at the night sky. These tools help me determine precisely where to set up my gear for the composition I have in mind.
Check the Weather
Weather and atmospheric conditions play a crucial role in moon photography. Clear skies are ideal, but some thin clouds can add drama to your shots. I always check multiple weather forecasts and satellite images in the days leading up to the shoot. Pay attention to humidity levels too – high humidity can create a hazy atmosphere, which might soften the moon's details but can also produce a beautiful, ethereal effect.
Here's a quick checklist I use when planning:
Determine the exact date and time of the Harvest Moon rise.
Scout locations in advance, considering both foreground elements and the direction of moonrise.
Use apps like PhotoPills to visualize the moon's position.
Check weather forecasts, including cloud cover and humidity.
Plan your arrival time – I usually get there at least an hour early to set up and adjust to changing light conditions.
For those looking to take their planning skills to the next level, I'm excited to mention that I offer workshops focused on landscape and night sky photography. These hands-on sessions are a great way to learn in the field and get real-time feedback on your technique and composition. It's always a thrill to see participants capture their first stunning moon shot during these workshops.
Remember, thorough planning sets the foundation for a successful shoot. It allows you to focus on creativity and execution when you're in the field, rather than scrambling to find the right spot or adjust your settings at the last minute.
Essential Gear for Harvest Moon Photography
When it comes to capturing the Harvest Moon, having the right gear can make all the difference. I've experimented with various setups over the years, and I'll share what I've found works best.
Cameras
Let's start with the camera body. While you can capture decent moon shots with entry-level DSLRs or mirrorless cameras, I've found that full-frame sensors excel in low-light conditions, offering better image quality and less noise. My go-to camera for night photography is the Sony A7R III, which provides excellent dynamic range and high resolution. However, crop sensor cameras like the Canon 90D or Nikon D7500 can also produce great results.
Lenses
Lens choice is crucial for moon photography. You'll want a telephoto lens to make the moon appear large in your frame. I typically use a 100-400mm zoom lens, which gives me flexibility in framing. For those really tight shots of the moon's surface, I sometimes use a 600mm prime lens.
If you're looking to try out different lenses before committing to a purchase, renting can be a cost-effective option. I've recently partnered with LensRentals.com, a trusted rental service that offers a wide selection of photography gear. By using the discount code TENSIX15, you can enjoy 15% off on your rentals. This helps me support my work as a photographer at no personal cost to you.
Tripods
A sturdy tripod is non-negotiable for sharp moon photos. Camera shake is the enemy of clear, detailed images, especially when using long lenses. I use a carbon fiber tripod for its lightweight yet stable design. Pair this with a remote shutter release or your camera's self-timer to minimize vibrations when taking the shot.
Optional gear
Other types of gear that can enhance your moon photography includes:
Lens filters: A neutral density graduated filter can help balance exposure between the bright moon and darker foreground.
Telescope adapter: For serious lunar photography, adapting your camera to a telescope can yield incredibly detailed moon shots.
Don't forget the essentials like extra batteries (cold nights can drain them quickly) and memory cards. I always pack a headlamp with a red light mode to preserve my night vision while setting up.
For those interested in expanding their gear collection, I often discuss equipment choices in my workshops. It's a great opportunity to see different setups in action and even try out new gear.
An overview of recommended gear
| Category | Equipment | Description | Notes |
|---|---|---|---|
| Cameras | Sony A7R III | Full-frame mirrorless camera with excellent dynamic range and high resolution. | Ideal for low-light conditions and detailed moon photography. |
| Canon 90D | Crop sensor DSLR camera with good low-light performance. | Versatile option for photographers at various skill levels. | |
| Nikon D7500 | Crop sensor DSLR camera with robust performance. | Provides great results in moon photography with proper lens choice. | |
| Lenses | 100-400mm Zoom Lens | Telephoto zoom lens with flexibility in framing. | Suitable for capturing the moon at various sizes within the frame. |
| 600mm Prime Lens | Long focal length prime lens for close-up shots of the moon's surface. | Ideal for tight, detailed shots of the moon. | |
| Tripods | Carbon Fiber Tripod | Lightweight yet stable tripod essential for long exposure and telephoto shots. | Reduces camera shake, crucial for sharp images. |
| Accessories | Remote Shutter Release or Self-Timer | Device or camera setting to trigger the shutter without touching the camera. | Minimizes vibrations during the shot. |
| Lens Filters (Neutral Density Graduated Filter) | Filter to balance exposure between the bright moon and darker foreground. | Helps in achieving balanced exposures in high-contrast scenes. | |
| Telescope Adapter | Adapter to connect your camera to a telescope. | Allows for highly detailed lunar photography. | |
| Power & Storage | Extra Batteries | Additional camera batteries to ensure extended shooting time. | Cold nights can drain batteries faster; essential for long sessions. |
| Memory Cards | High-capacity and fast memory cards for storing large RAW image files. | Ensure you have enough storage for high-resolution images. | |
| Lighting | Headlamp with Red Light Mode | Headlamp with a red light option to preserve night vision while setting up. | Useful for setting up gear in low-light conditions without affecting your night vision. |
| Optional Gear | Wide-Angle Lens | Lens for capturing wider landscape shots that include the moon. | Useful for contextual moon shots with foreground elements. |
| Intervalometer | Device for setting up time-lapse sequences or long exposures. | Ideal for capturing the moon’s movement or long exposure shots. | |
| Star Tracker Mount | Mount that tracks the movement of the moon and stars, allowing for longer exposures without motion blur. | Helps in achieving sharp long-exposure shots of the moon and stars. | |
| Portable Power Bank | External battery pack for charging camera batteries or other electronic devices. | Useful for extended sessions where access to power outlets is limited. | |
| Cleaning Gear | Lens Cleaning Kit | Kit including microfiber cloth, lens cleaning solution, and blower. | Keeps lenses and camera sensors clean from dust and smudges during outdoor shoots. |
| Rain Cover | Protective cover for camera and lens during inclement weather. | Essential for protecting gear in unpredictable outdoor conditions. |
Don't let a lack of high-end equipment stop you from getting out there and shooting the Harvest Moon. While good gear can certainly help, it's your vision and technique that truly make a great photograph. I've seen stunning moon shots taken with entry-level gear and mediocre images captured with top-of-the-line equipment. The key is to know your gear inside and out, whatever level you're working with.
Camera Settings for Great Moon Shots
Getting the right camera settings for moon photography can be tricky. I remember my first attempts resulted in either a glaring white blob or a tiny, barely visible speck. Through trial and error, I've honed in on a set of guidelines that consistently produce great results.
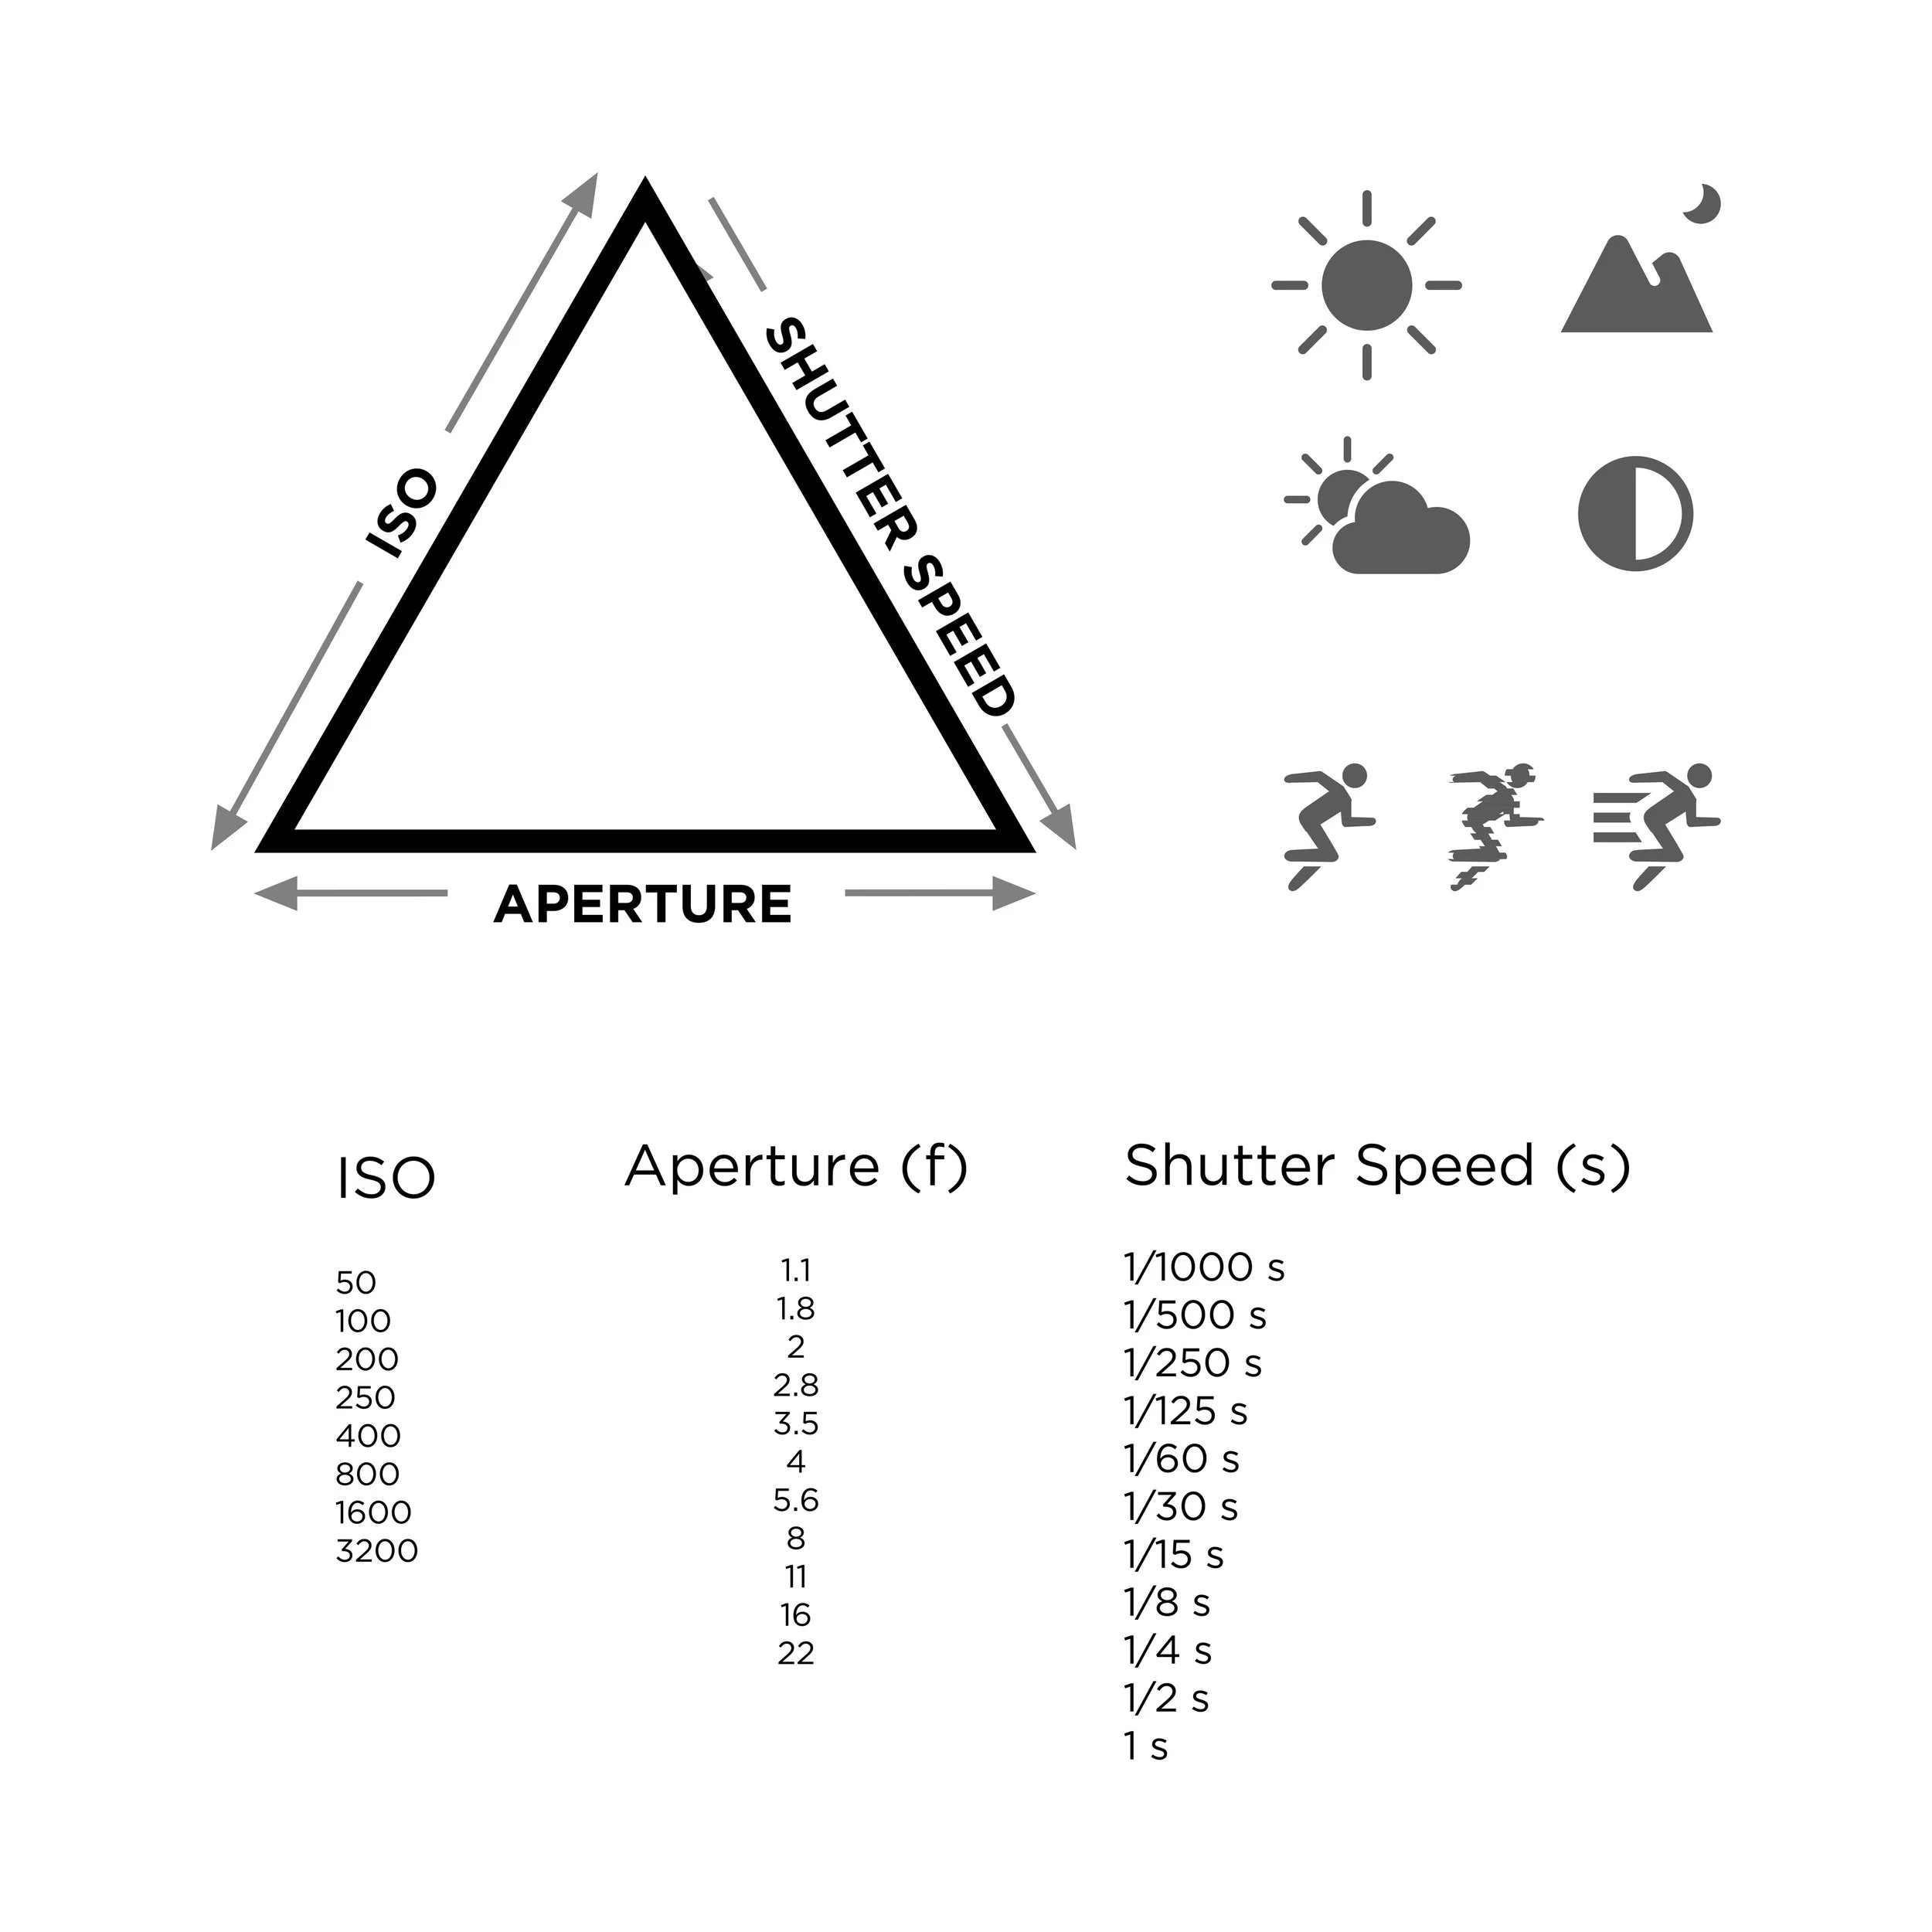
The Exposure Triangle
For moon photography, I typically use:
Aperture: f/8 to f/11. This range provides a good balance between depth of field and sharpness. I've found that most lenses perform best in this range.
Shutter Speed: 1/125 to 1/250 second. The moon moves faster than you might think! These speeds help freeze its motion.
ISO: As low as possible, usually 100 or 200. This minimizes noise in your image.
I often need to adjust based on the specific conditions and the phase of the moon. The Harvest Moon, being full, is quite bright, so you might need to use even faster shutter speeds or smaller apertures.
Focusing
Focusing can be challenging in low light. I usually switch to manual focus and use my camera's live view feature, zooming in digitally to ensure details are sharp. If your camera has a focus peaking feature, it can be incredibly helpful for achieving precise focus.
White Balance
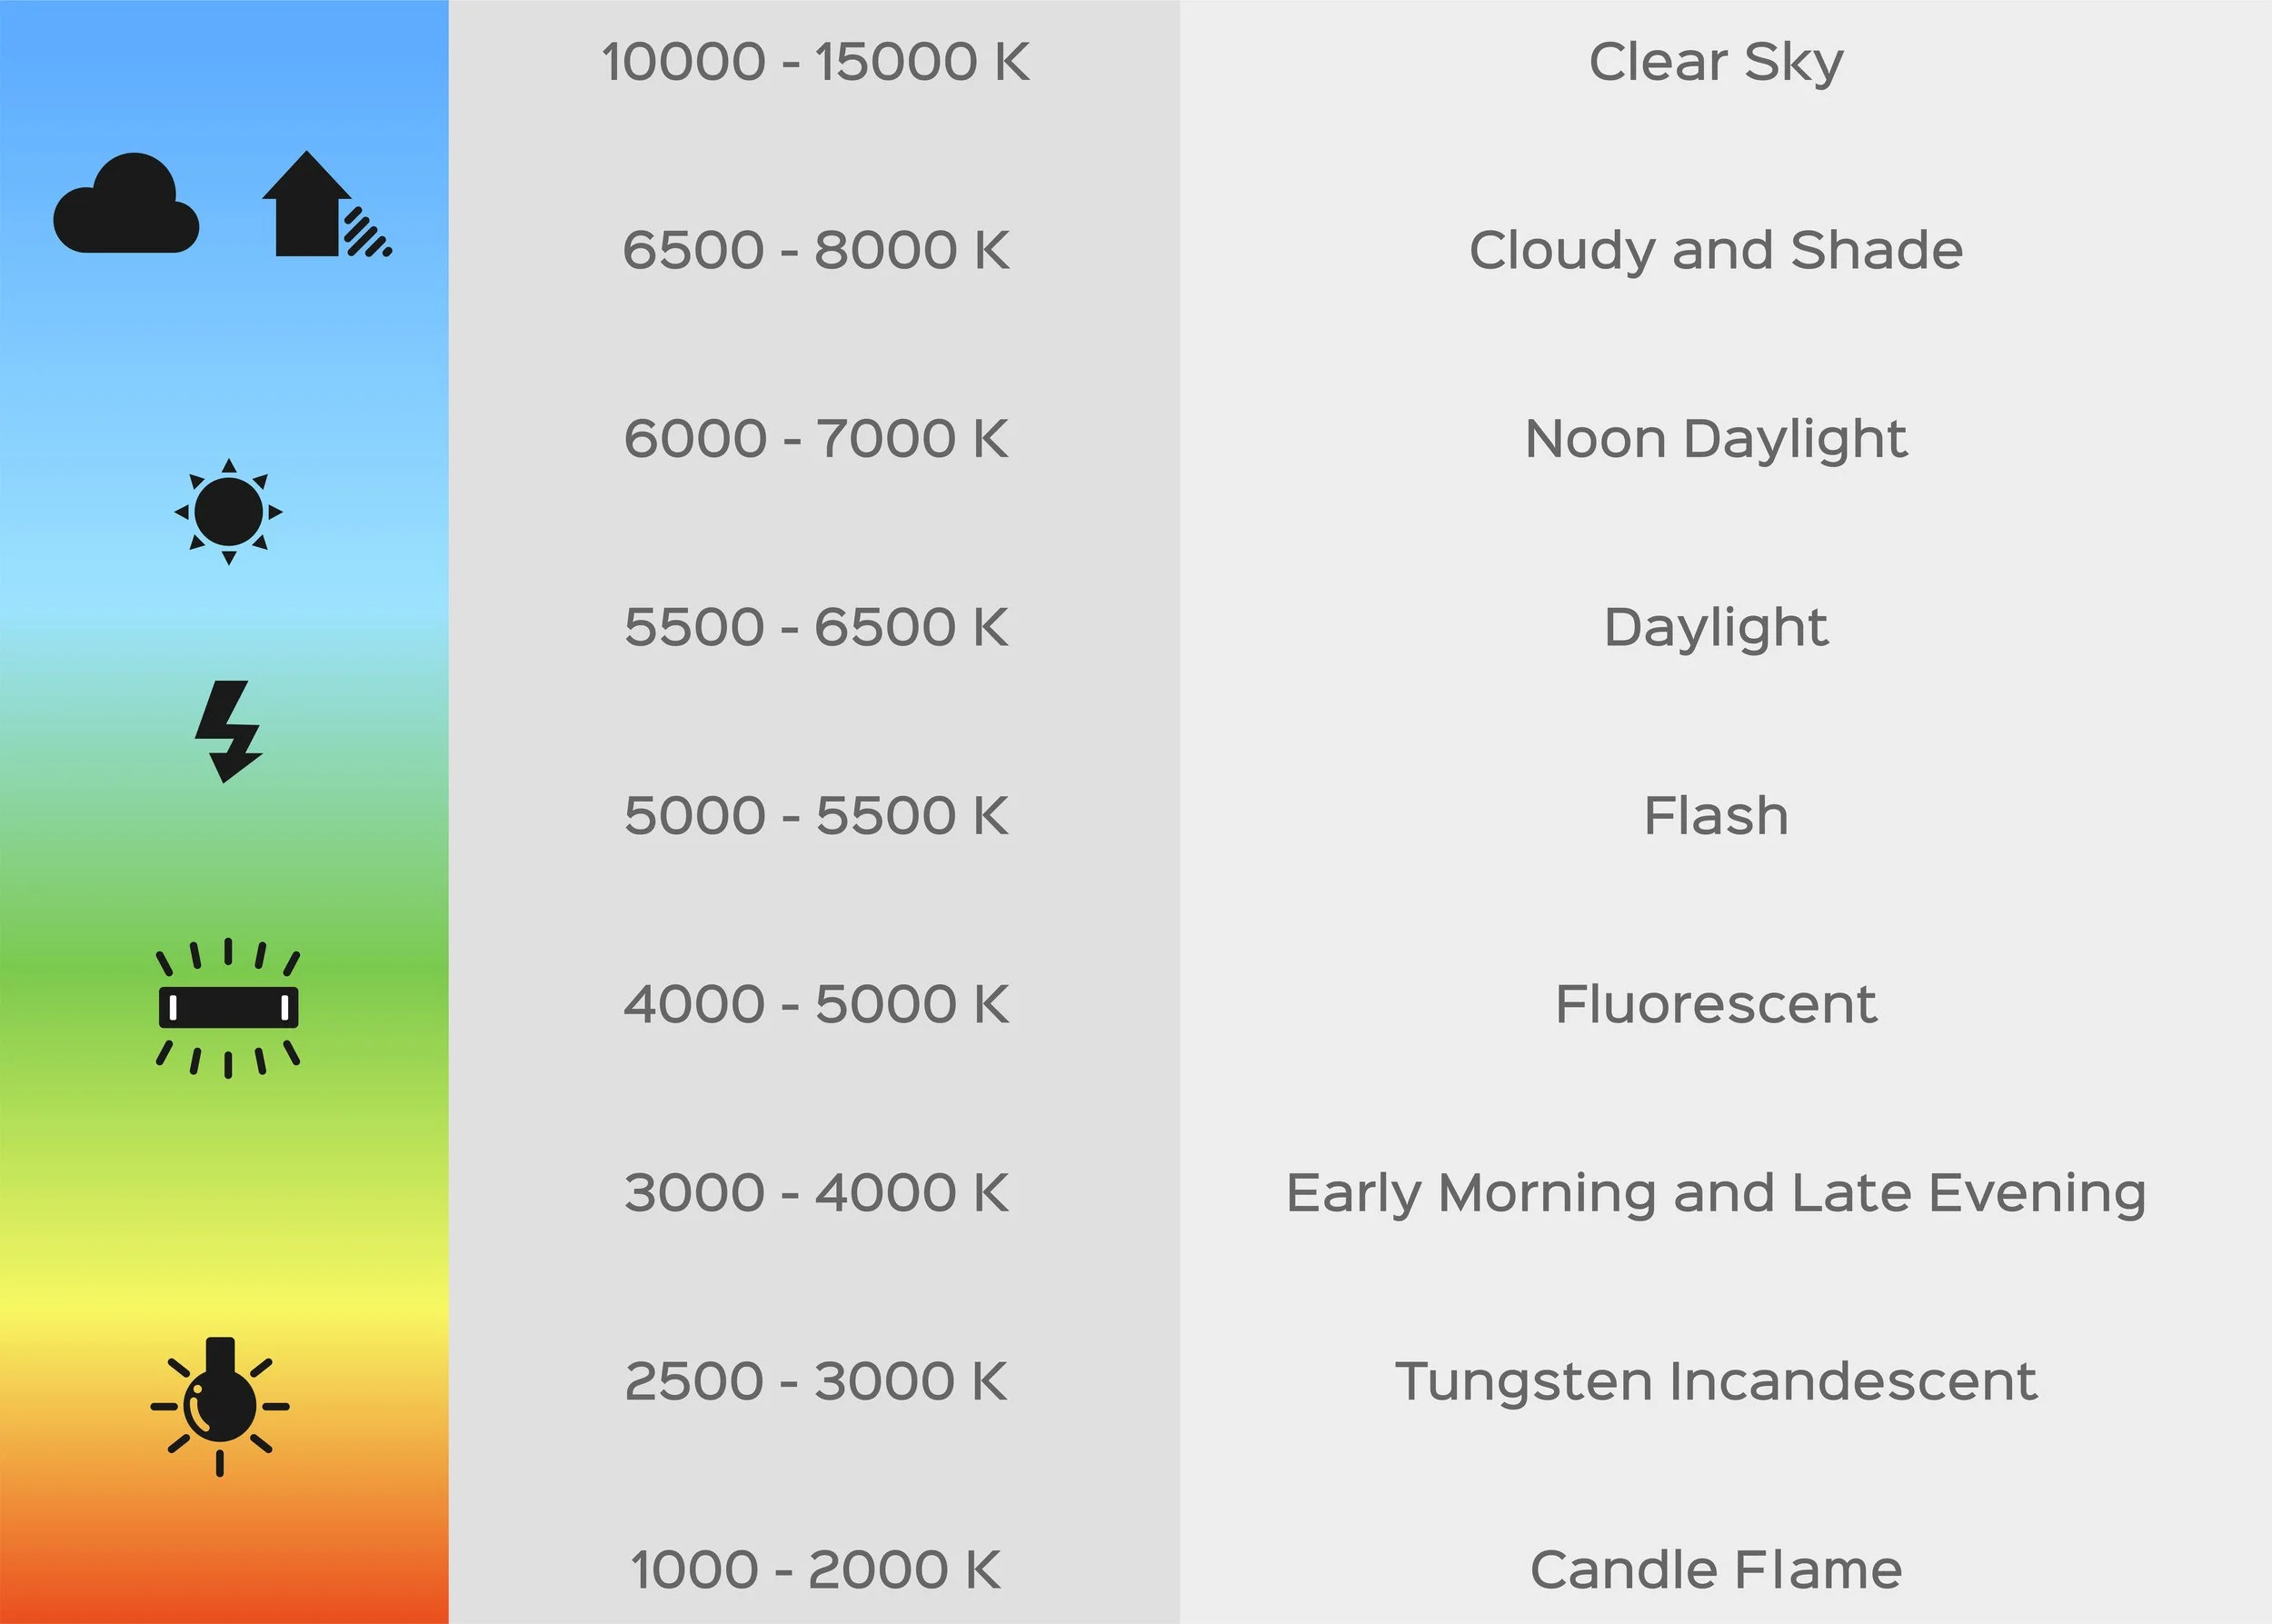
White balance is another consideration. I prefer to shoot in RAW and adjust white balance in post-processing, but if you're shooting JPEG, try the "Daylight" white balance setting. It often produces the most natural-looking results for moon photography.
Bracketing
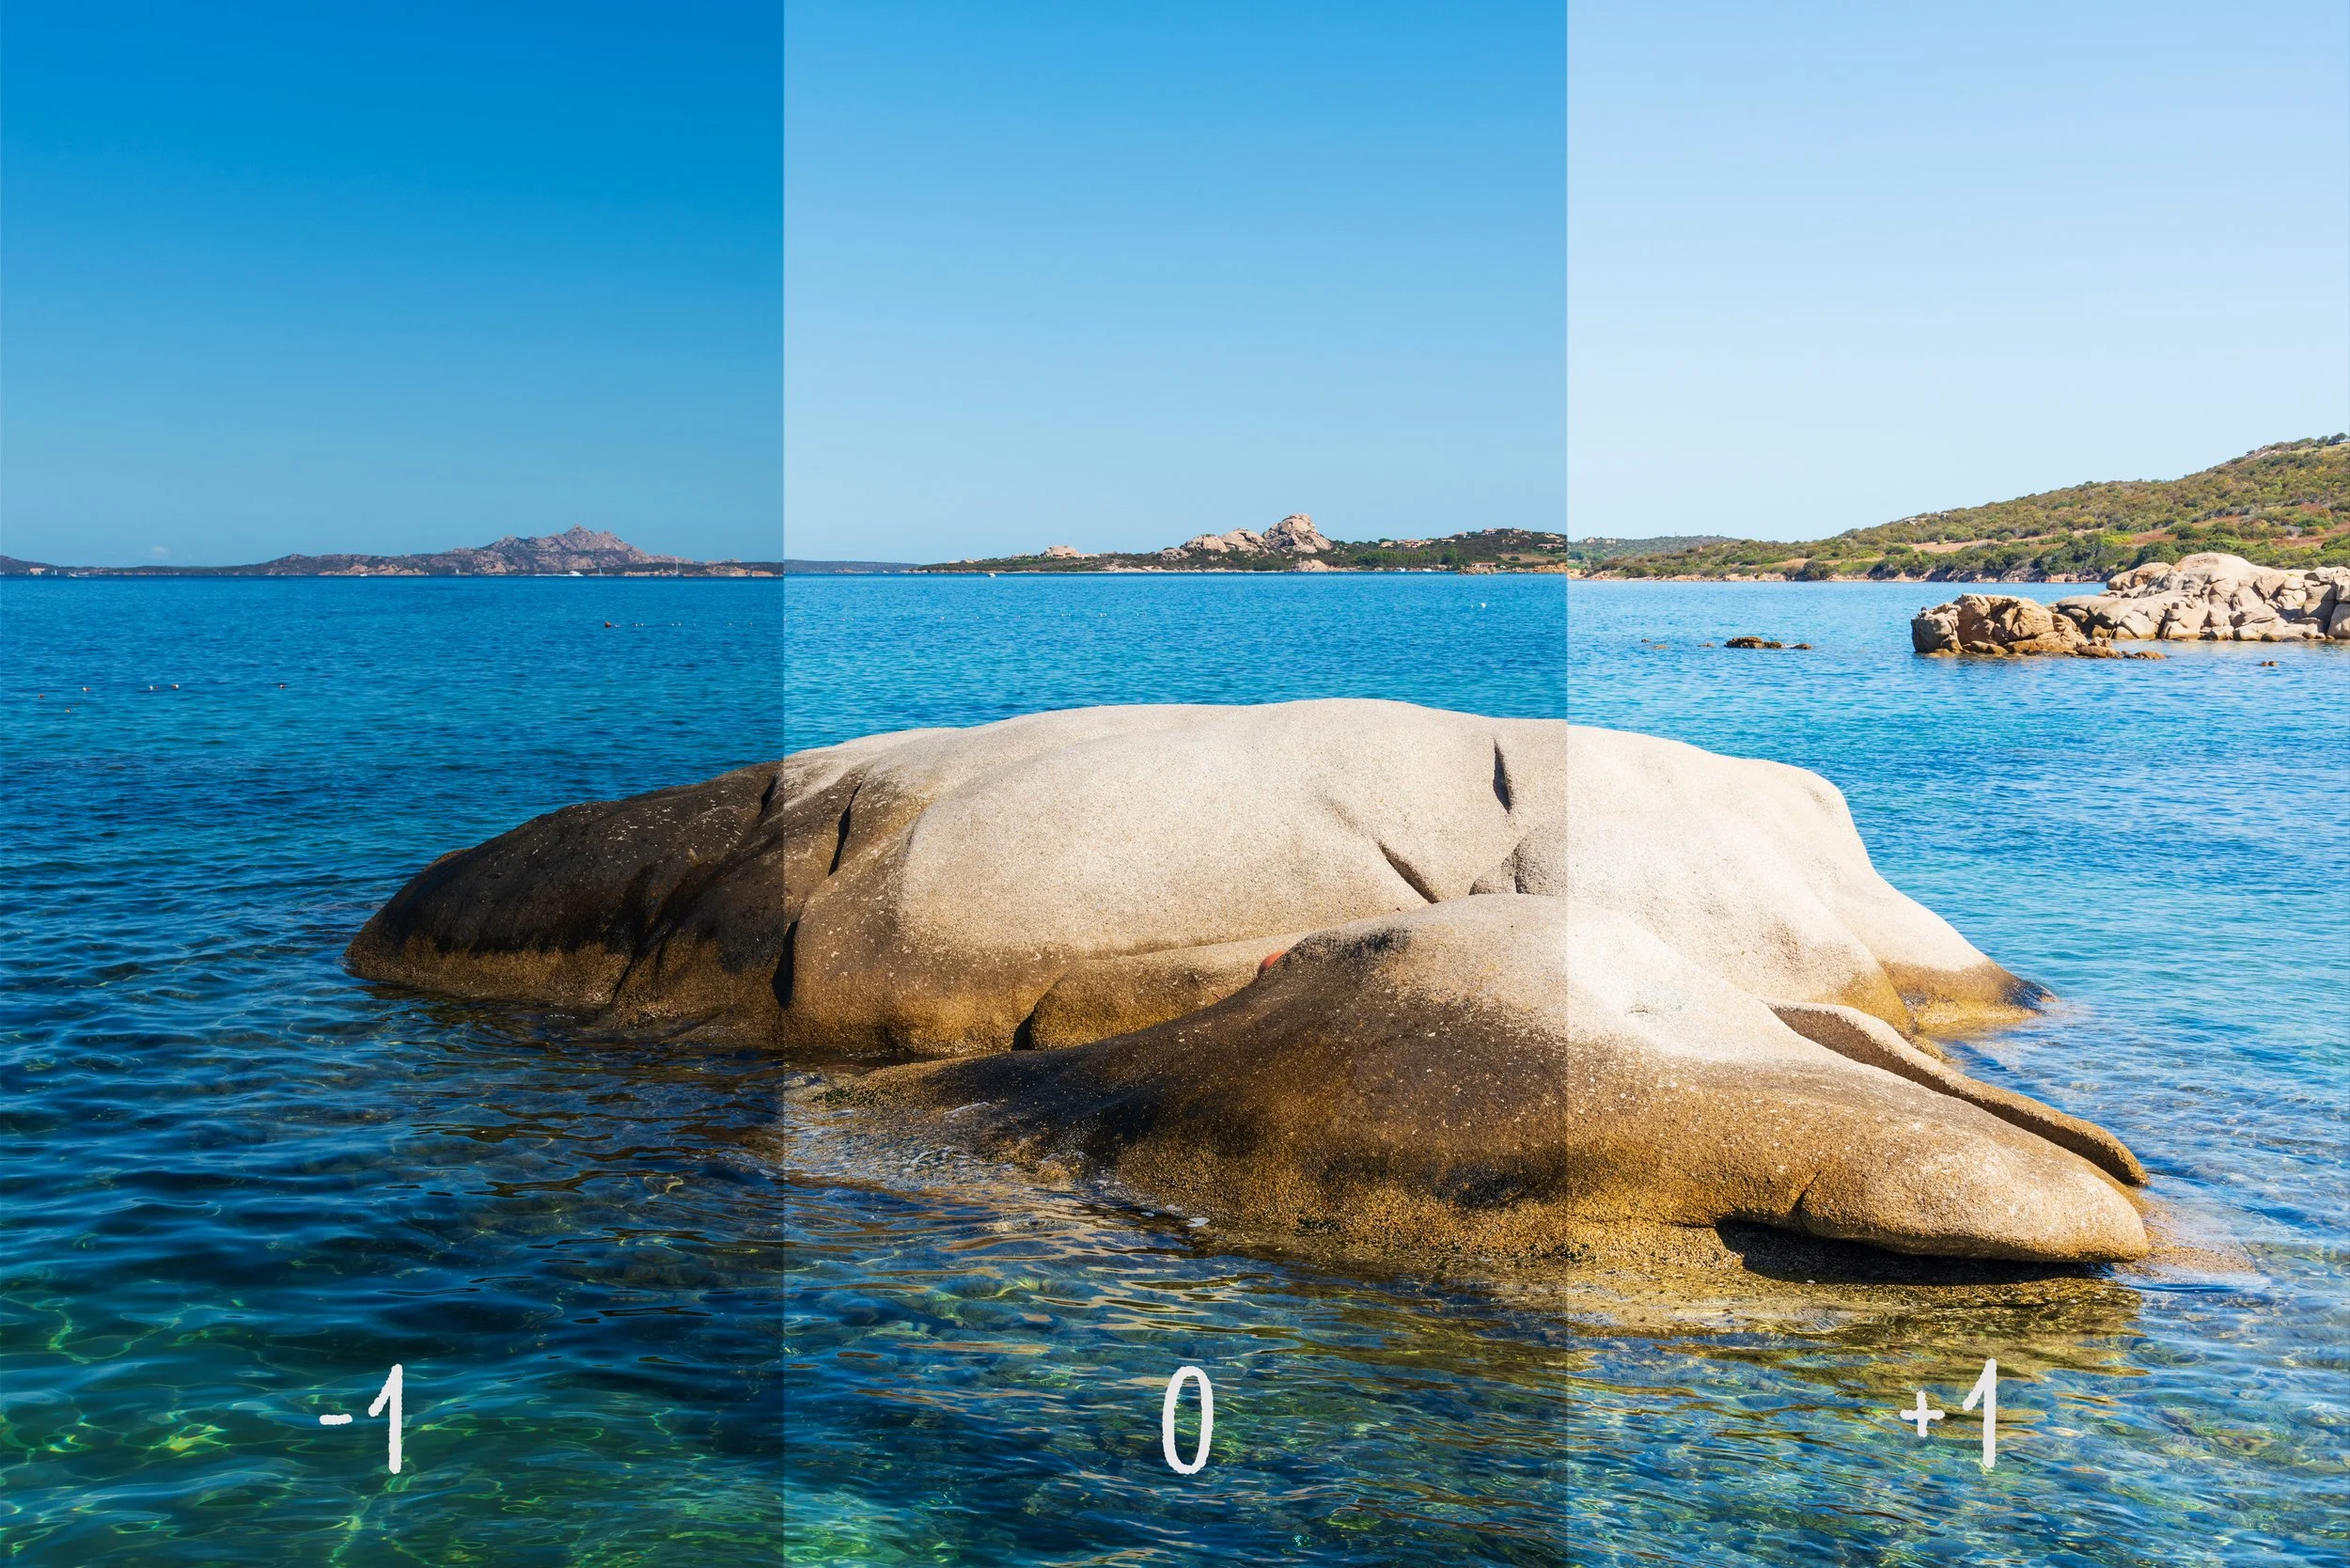
One technique I've found helpful is bracketing my exposures. I'll often take three shots: one at the settings I think are correct, one slightly underexposed, and one slightly overexposed. This gives me options to work with later and helps ensure I don't miss the shot due to incorrect exposure.
Remember, these settings are guidelines, not rules. Don't be afraid to experiment and find what works best for your specific situation and creative vision. The more you practice, the more intuitive these settings will become.
Composition Techniques
Composition can make or break your Harvest Moon photograph. While the moon itself is undoubtedly spectacular, I've learned that the most compelling lunar images often incorporate interesting foreground elements and thoughtful framing.
The Rule of Thirds
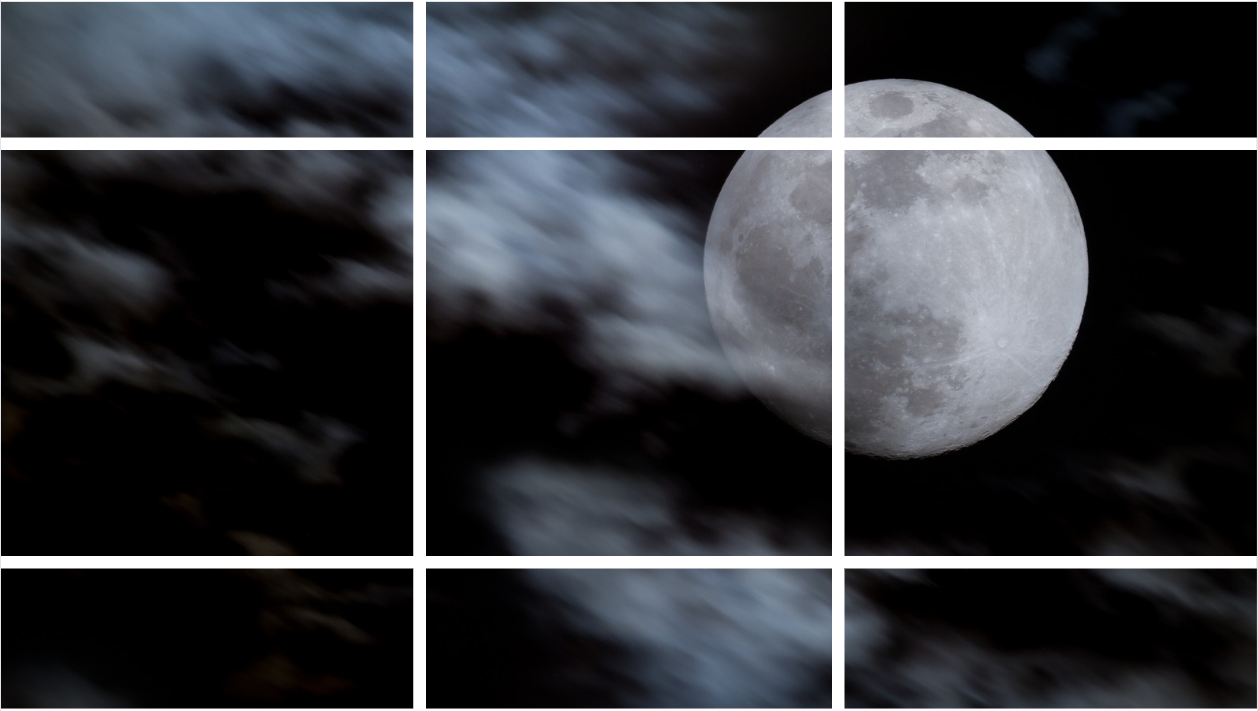
The rule of thirds is a great starting point for moon photography. I often place the moon at one of the intersection points rather than dead center in the frame. This creates a more dynamic and engaging composition. Don't be afraid to break this rule if the scene calls for it.
Foregrounding and Silhouetting
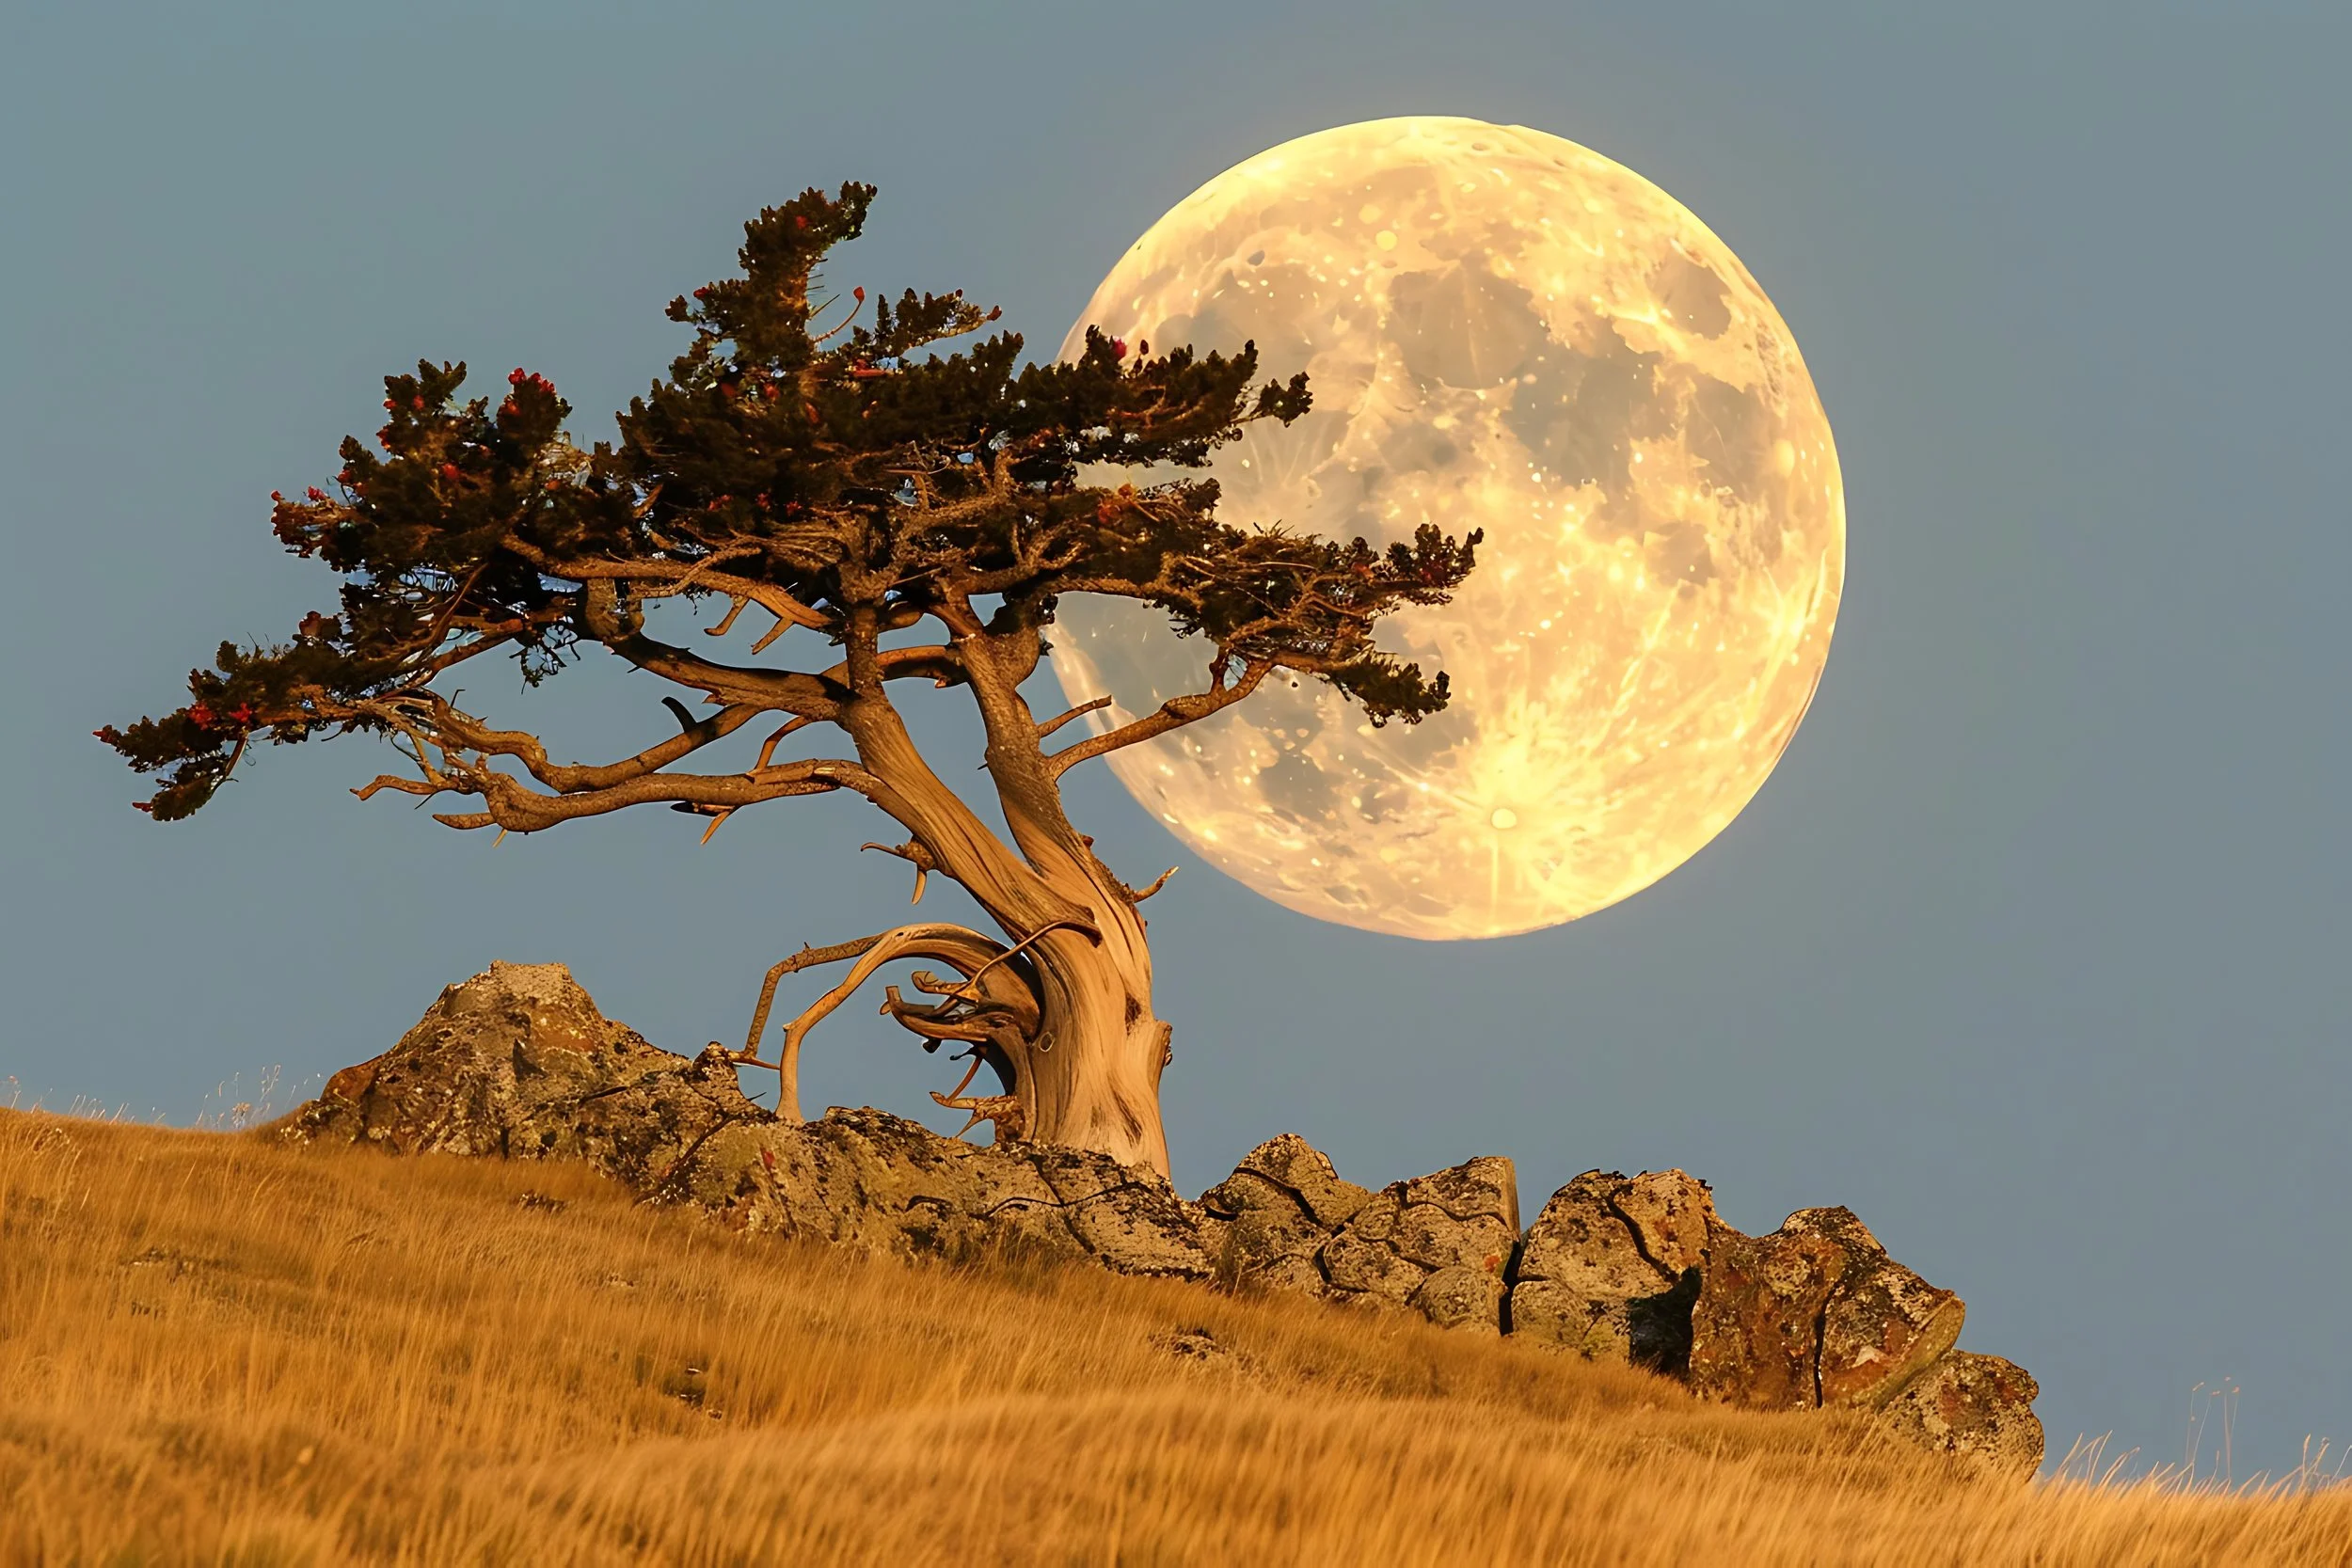
Including foreground elements can add depth and context to your moon shots. Use silhouettes of trees, buildings, or mountains to frame the moon. One of my favorite shots involved capturing the Harvest Moon rising behind a lone, gnarled tree on a hilltop. The contrast between the tree's dark, intricate branches and the moon's bright, smooth surface created a captivating image.
Negative Space
Sometimes, a vast expanse of dark sky can make the moon appear even more dramatic. I've experimented with minimalist compositions where the moon is the only element in an otherwise empty frame, and the results can be quite powerful.
Lastly, consider the moon's position in relation to other elements in your frame. Look for opportunities to create interesting juxtapositions or alignments.
Capturing the Shot: Step-by-Step Guide
After all the planning and preparation, the moment of truth arrives when it's time to actually capture your Harvest Moon shot. Here's my step-by-step process that I've refined over years of lunar photography:
Setting up your gear: I always arrive at my chosen location at least an hour before moonrise. This gives me plenty of time to set up without rushing. I start by mounting my camera on the tripod, ensuring it's stable on the ground. If it's windy, I'll hang my camera bag from the center column for added stability. I attach my chosen lens and double-check that all connections are secure.
Framing the shot: With my camera set up, I compose my shot based on where I know the moon will rise. This is where all that planning with smartphone apps pays off. I use the app's augmented reality feature to visualize exactly where the moon will appear. I then adjust my composition, keeping in mind the rule of thirds and any foreground elements I want to include.
Fine-tuning settings: Next, I dial in my initial camera settings. I typically start with:
• Aperture: f/8
• Shutter speed: 1/125 sec
• ISO: 100
I then switch to manual focus and use live view to focus on a distant object where the moon will appear. If there's still some daylight, I'll take a test shot of the landscape to ensure my composition looks good.Taking the photo and checking results: As the moon begins to rise, I start shooting. I always use a remote shutter release or the 2-second timer to avoid camera shake. After each shot, I check the histogram to ensure I'm not clipping highlights or shadows. If the moon is overexposed, I'll increase my shutter speed. If it's underexposed, I'll either slow down the shutter speed or bump up the ISO slightly.
Bonus Tips
Take multiple shots, slightly adjusting settings each time. This bracketing technique ensures you have options to choose from later. Experiment with different compositions as the moon rises higher in the sky.
Take a separate exposure for the foreground if it's significantly darker than the moon. Blend these exposures in post-processing for a balanced final image.
Periodically check your focus and adjust if necessary. The changing light conditions as night falls can sometimes throw off autofocus systems.
Remember, patience is key. Some of my best shots have come after waiting for clouds to clear or for the moon to reach just the right position in the sky. Don't be discouraged if your first few shots aren't perfect – keep adjusting and shooting until you capture that magical moment.
Post-Processing Your Harvest Moon Photos
Once I've captured my Harvest Moon shots, the journey isn't over. Post-processing is where I can really bring out the beauty of the image and correct any minor issues from the shoot. Here's my typical workflow:
Basic adjustments in Lightroom: I start in Adobe Lightroom, importing my RAW files and making basic adjustments. First, I adjust the white balance to ensure the moon's color looks natural - usually a bit on the warm side for the Harvest Moon. Then, I fine-tune the exposure, being careful not to blow out the highlights on the moon's surface.
I often find that reducing highlights and boosting shadows can help reveal more detail in both the moon and any foreground elements. Clarity and texture sliders can be great for enhancing the moon's craters, but I use them sparingly to avoid an unnatural look.
Advanced techniques in Photoshop: For more complex edits, I move to Photoshop. One technique I often use is blending multiple exposures. I'll take one exposure for the moon and another for the foreground, then blend them using layer masks. This allows me to properly expose both elements without losing detail.
Another trick I use is to create a sharper image of the moon using a technique called 'image stacking'. I'll take several shots of the moon and use Photoshop's auto-align and auto-blend features to combine them, resulting in a much sharper and detailed moon.
Enhancing moon details: To really make the moon pop, I sometimes use selective adjustments. I'll create a new layer, use the 'dodge' tool to lighten the brighter areas of the moon, and the 'burn' tool to darken the shadows. This increases contrast and makes the craters more visible. The key here is subtlety - I want to enhance what's there, not create something that wasn't in the original image.
Color grading: For the final touch, I often apply some subtle color grading. For Harvest Moon photos, I like to enhance the warm, golden tones. I'll use Photoshop's Color Balance adjustment layer, slightly increasing the reds and yellows in the highlights and midtones.
Throughout this process, I constantly toggle my edits on and off, making sure I'm enhancing the image without going overboard. The goal is to create a final photograph that captures the awe I felt when I first saw that Harvest Moon rising.
There’s no need to spend hours finetuning and adjusting your images when I have free Lightroom presets to offer.
Conclusion
The techniques and tips I've shared are just starting points. The true magic happens when you bring your unique vision and creativity to the process. Don't be afraid to experiment, make mistakes, and learn from them. Each time you head out to shoot the moon, you'll discover something new.
I encourage you to use these techniques to improve your autumn night sky photography. Plan your shoot, set up your gear, and capture the beauty of the Harvest Moon. And don't forget to take a moment to simply enjoy the view – sometimes the most memorable part of the experience is just being there, under the magnificent glow of our wonderful night-time neighbor.
Additional Resources
If you're eager to dive deeper into photography, I've got some great resources for you.
Check out my blog post on the basic gear for astrophotography.
For those interested in broader night sky photography, my post on photographing meteor showers offers complementary techniques.
I'm excited to announce my upcoming Astro Nights Workshop in Kanab, Utah where we'll put these techniques into practice. It's a fantastic opportunity for hands-on learning and to connect with fellow night sky enthusiasts.
Remember, the best way to improve is through practice. I can't wait to see your Harvest Moon shots!
FAQ
How do I calculate the exact angular size of the moon in my frame for precise composition planning? To calculate the moon's angular size, divide your lens's focal length by 109. For example, a 500mm lens will render the moon at about 4.6 degrees in your frame (500/109 ≈ 4.6°). Use this in conjunction with planning apps for precise framing.
What's the best approach for capturing the Harvest Moon's motion across the sky in a single image? Consider using the "image stacking" technique. Take multiple exposures as the moon moves, then blend them in post-processing. Alternatively, try a long exposure with a neutral density filter to create a motion blur effect of the moon's path.
How can I leverage the unique characteristics of the Harvest Moon's light for creative landscape photography? The Harvest Moon's low angle and warm light can be used for "moonlit landscapes." Experiment with long exposures (30 seconds to several minutes) to illuminate landscapes solely with moonlight, creating an ethereal, day-for-night effect.
What's the optimal ISO to use for maintaining detail in both the moon and foreground elements? This depends on your camera's dynamic range. Try the "expose to the right" (ETTR) technique, pushing your ISO as high as possible without clipping highlights. Modern full-frame cameras can often handle ISO 1600-3200 while maintaining good detail.
How do I account for atmospheric refraction when planning my Harvest Moon shot? Atmospheric refraction can cause the moon to appear about 0.6° higher than its actual position. Use advanced planning tools like PhotoPills that account for this, or mentally adjust your composition slightly lower than calculated.
What's the best method for achieving accurate color balance in Harvest Moon photos? Use a gray card to set a custom white balance during the shoot. In post-processing, the moon's surface should be a neutral gray. Use selective color adjustments to maintain the warm glow of the rising moon while keeping the overall scene balanced.
How can I leverage the "blue hour" for unique Harvest Moon compositions? Plan to shoot during civil twilight when there's still some color in the sky. Use graduated ND filters or exposure blending to balance the brighter moon with the dimming landscape. This can create striking contrasts between warm and cool tones.
What's the best approach for capturing earthshine during a Harvest Moon event? Earthshine is typically visible just before or after the full moon. Use a longer exposure (2-4 seconds) at a higher ISO (1600-3200) to capture the faint illumination on the dark part of the moon. Blend this with a properly exposed shot of the bright part of the moon in post-processing.
How do I mitigate the effects of heat distortion when shooting the Harvest Moon low on the horizon? Heat distortion can blur moon details. Try shooting from an elevated position to reduce the amount of atmosphere you're shooting through. Alternatively, use image stacking techniques, taking multiple quick exposures and aligning them in post-processing to increase sharpness.
What's the most effective way to capture the Harvest Moon's apparent size change as it rises? Set up a telephoto lens on a fixed tripod and take shots at regular intervals (every 5-10 minutes) as the moon rises. In post-processing, create a composite image showing the moon's changing size and color. Ensure your camera settings remain consistent for accurate comparison.


